Hey guys so I've done something very different today!
I've decided to do a nail art tutorial for you guys. I love painting my nails and experimenting with nail art. So here's a tutorial for melting nails!
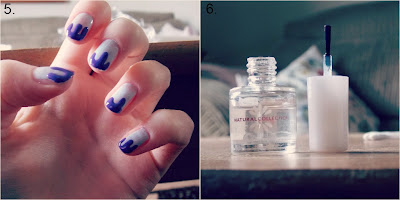
Nail Polish in this tutorial: Natural Collection - Crystal Clear / H&M - Beauty Bandit (purple) / Rimmel London - Sweet as Sugar (Light Blue).
I start off with painting Sweet as Sugar all over my nails as the base coat. I then apply a small amount of Beauty Bandit onto cotton wool and dip my cotton bud into the polish then apply it onto the tips of my nails to create a melting effect. You can also do this effect just with your brush. Just take your time!
After applying the melting effect on all of your nails give the polish time to dry then generously add Crystal clear all over to ensure the polish doesn't drag across the nails. Make sure to add the clear coat quickly due to the brush dragging the other products and ruining the nail art. Then simply wait for it all to dry then you are done! It's that simple!
Here is the final product! I hope this tutorial has helped!
Let me know what you think in the comments below.
Also I have a treat for my lovely readers! If you want to have 20% off Motel Rocks simply type in the voucher code 'chloescaresyou' at the checkout! Enjoy!
Chloe x


This is amazing! I really want to try it but I'm so bad at nail art too impatience, lol!
ReplyDeleteWould love you to have a look at my #globalstyler outfit post lazy2lovely.blogspot.co.uk
AWh thank you! It's so simple! Patience is something you'd need though haha! :)
Delete