

Hello!
I'm doing something a little different today so if you like this post please feel free to comment and I will certainly do many more for you. So my beautiful friend Elise agreed for me to do her makeup for my blog. So this look can be worn for prom or even everyday because it's so versatile.
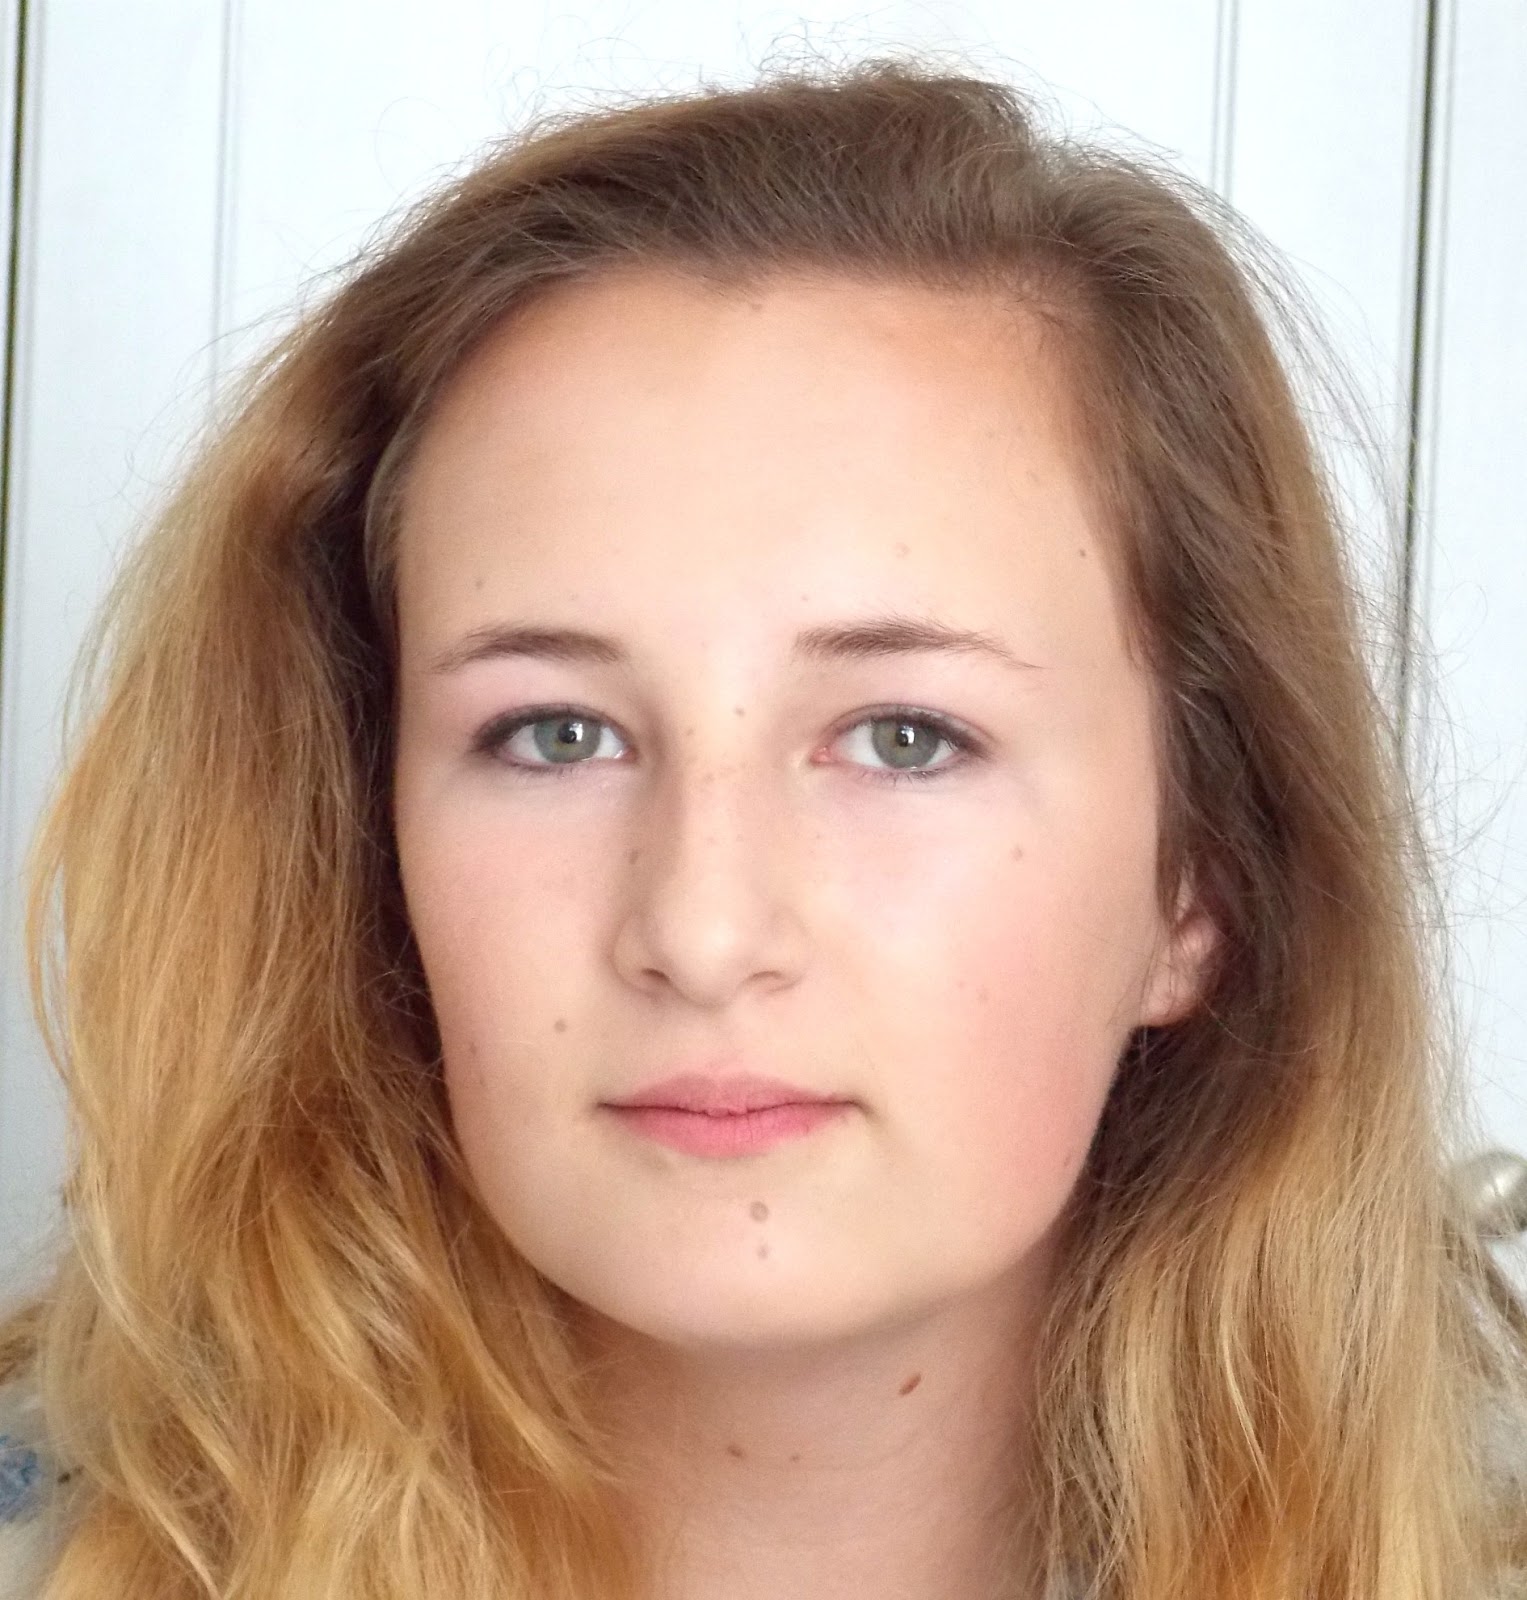
So here's Elise all fresh faced! Now Elise has amazing skin so I wanted to ensure that I
enhanced her natural skin rather than hiding it. So I started off with using my Rimmel London's '25 Hour Lasting Finish' foundation. I only used a small amount of this just to even out her skin tone. I then applied Collections 'Lasting Perfection' concealer under the eyes and around the nose area. After that I applied Sleek's 'Face Form' bronzer and applied it to the points of the face where the sun naturally hits such as the forehead, nose, cheeks etc. I then added a touch of Mac's cream blush to the apples of Elise's cheeks and buffed it in with a blush brush. I then finished off the base by sweeping over a fine layer of Rimmel London's 'Clear Complexion' powder to set the base.

I used a dark brown eye shadow just to fill in Elise's eyebrows. Now time for the eyes! I started off by applying an eye primer. I'm not sure the name of my eye primer because the label wore away oops! but it does the job. I am using the MUA 'Undress Me Too' palette for this look. I started off by applying the gold eye shadow (left) all over the lid. I applied this generously but if you do want to create a stronger look this shadow is build-able or if you are looking for a softer look then simply pat on less. I then applied the bronze shadow (right) to the outer corners and crease of the eye. I applied this shadow in an angled V shape due to me adding liner afterwards so it gives me a faint outline of where the eyeliner should go. I again applied this generously but ensured that I blended the outer corners well so there are no harsh lines. I finally added a small amount of the gold under the eyes and a light shimmer eye shadow to the tear ducts of the eyes and under the brow.
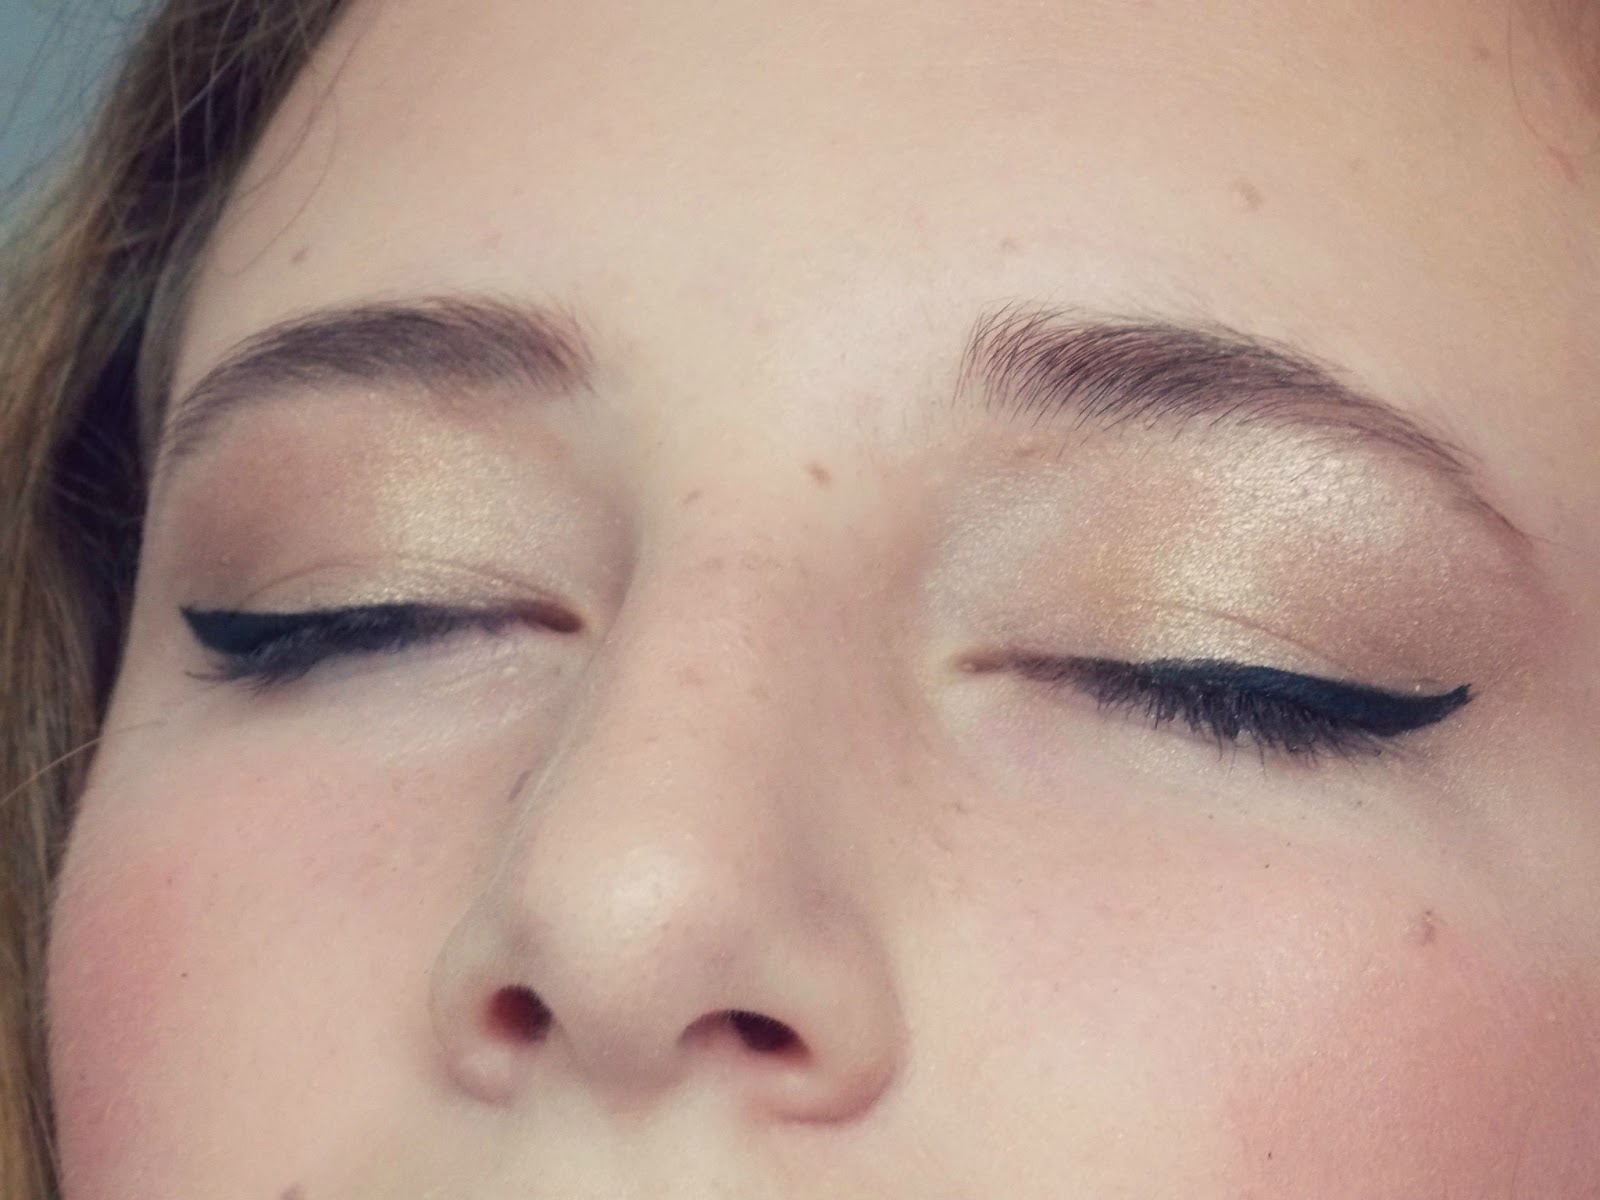
I then applied my Collection 'Fast Stroke' eyeliner to the eyelids. I started off by creating the winged line then simply dragged the liner inwards until I was half way across Elise's eyelids.

Almost done! I then applied a small amount of Benefits 'They're Real' mascara to the upper and lower lashes. To finish the eyes off I applied the Katy Perry 'Sweetie Pie' lashes (this is optional depending on what occasion it is for) using tweezers. I find the Eylure lashes so easy to apply and they stay on all day! I then finished off with Topshop's 'Rumor Has It' Lipstick.

Done!
I hope you enjoyed this tutorial and let me know if you'd like to see more!
Chloe x
I love this, there is such a massive difference between the before and after pictures =)
ReplyDeleteI have a UK only give away on my blog, if you would like to check it out =)
Corinne x
www.skinnedcartree.com
Awh thank you so much! Really glad you liked it! :)
DeleteDefinitely thank you! x